Requirement:
Stereoscopic Player 1.5.4 or above.
How to use 3Dfier with 3D Vision Video Player or Stereoscopic Player
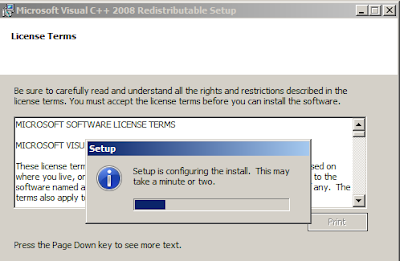
1. Uninstall the prior version of 3Dfier. Be sure to install the Visual C++ 2008 redistributable (vcredist_x86.exe) for the first time installation of new 3Dfier.
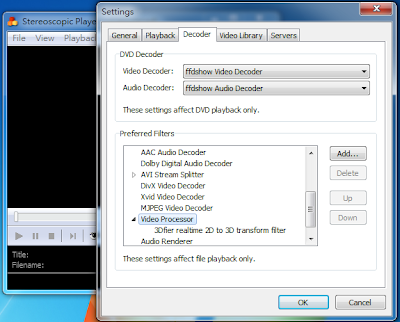
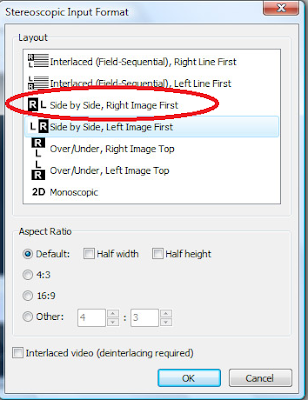
When opening a video file from Stereoscopic Player, select Side-by-Side input format.
After successfully installed 3Dfier, you can find 3Dfier Control Panel on the Desktop and in the Windows Start Menu.

Launch 3Dfier Control Panel and you will find a 3D icon in the system tray.
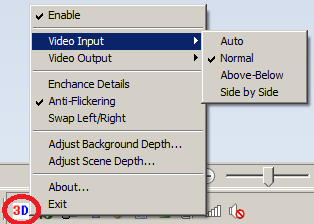 Right Click on the 3Dfier icon to get access to the controls:
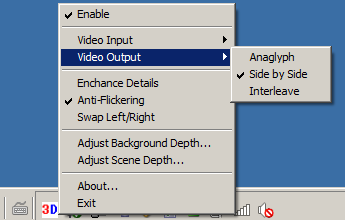
1. [Enable]: click on this to enable or Disable 3Dfier 2D to 3D conversion. Any selection will take effect only when you launch Strereoscopic Player or open a file next time when filter driver can be loaded.
2. [Video Input]: In order to make 2D to 3D conversion work for Stereoscopic Player, please select "Normal" (default).
3. [Video Output]: Select "Side by Side" (default) for Stereoscopic Player.
4. [Enhance Details]: This is a new feature that could take more CPU usage in order to render detail 3D effects.
5. [Anti-Flickering]: For reducing the flickering effects during scene change. (default enabled)
6. [Swap Left/Right]: This is for swapping left and right eyes depending on the left and right settings you might set for Stereoscopic Player.
7. [Adjust Background Depth]: This is used to adjust the depth of the background.
8. [Adjust Scene Depth]: This is used to move the overall scene forward or backward.
With these settings properly set, you can start to enjoy our most natural 2D to 3D conversion experience we are to offer. Thanks for using 3Dfier.